Over 30 years of anarchist writing from Ireland listed under hundreds of topics
Practical Guide: How to Make a Good Banner
This is a detailed guide on how to make a political banner for a demonstration or banner drop. It uses 3 real examples to illustrate. [Download as PDF]
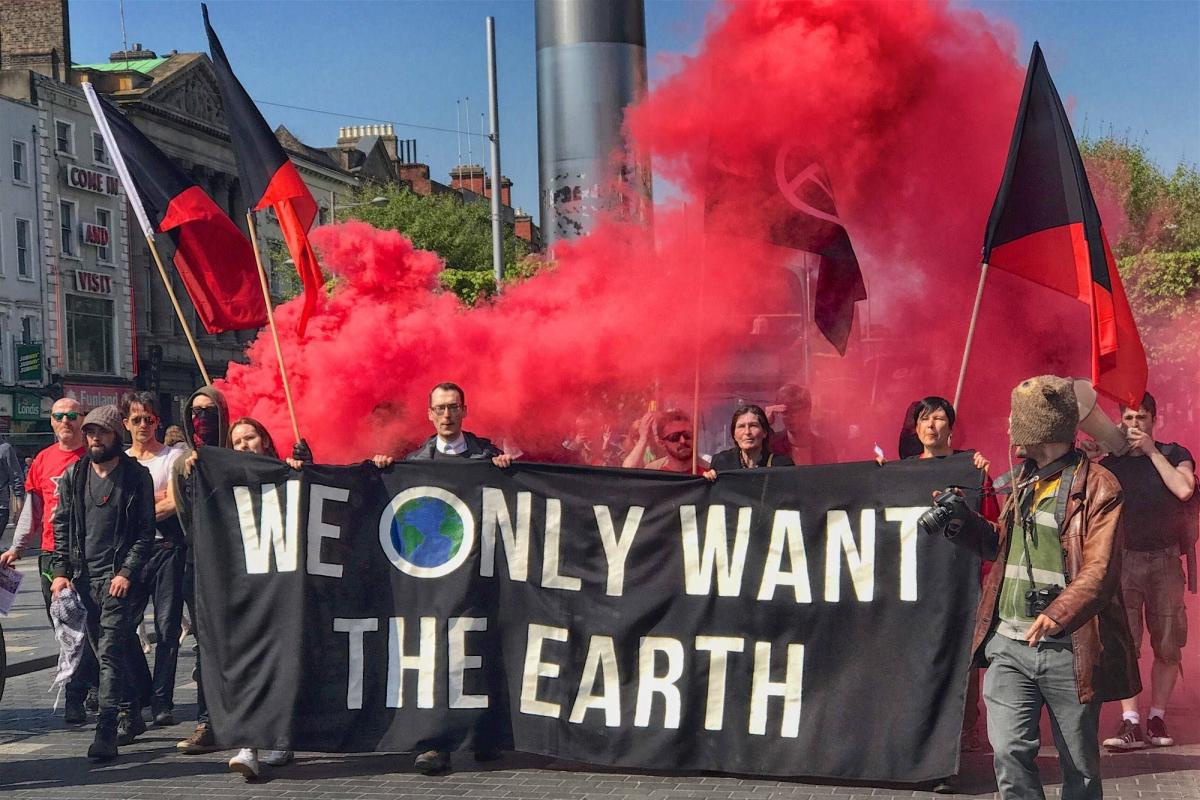
These 3 banners are:
-
The May Day banner. Made for the anarchist bloc called by the WSM for Dublin's May Day march 2017.
-
The Pride banner. Made for the Working Class Queeroes "Fucking Dregs" bloc on Dublin LGBTQ Pride 2017.
-
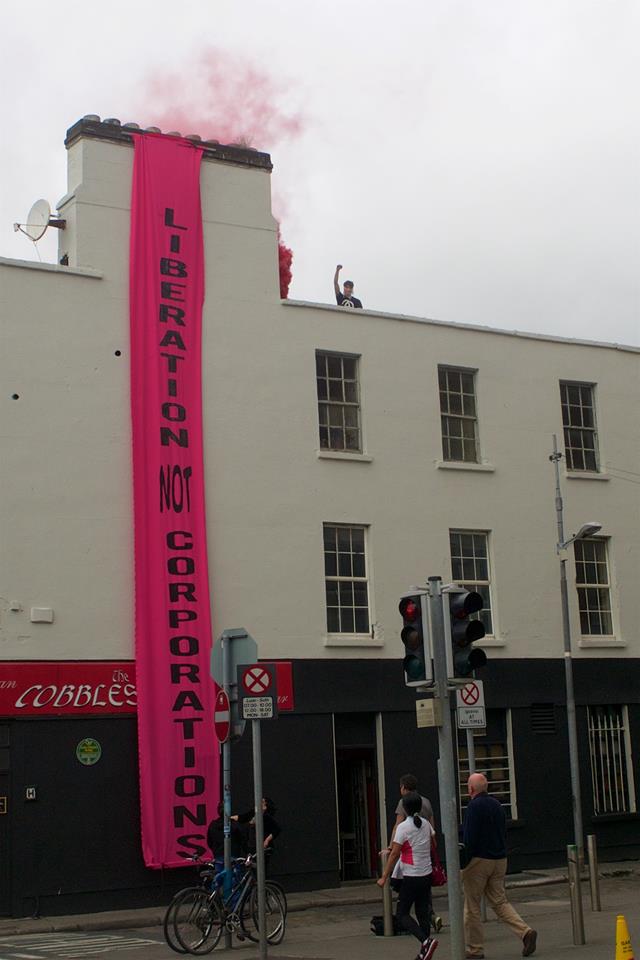
The Drop banner. Made for a banner drop by the Working Class Queeroes in the morning of the same Pride.
The May Day banner came first, so the guide refers to that unless specifically stated otherwise.
This how-to guide could be a lot shorter, but it includes a high level of detail so that you can get maximum benefit from these banner-making experiences. This includes the reasoning behind decisions, and real mistakes made plus the lessons learned. You won't be making the same banner under the same conditions, so this approach will give you a feel of how to do things, and let you adapt to your own requirements.
-
General Notes
-
Cost
-
Time
-
Engagement
-
-
Design
-
Words
-
Material
-
Design
-
-
Making the Banner
-
Method
-
Supplies
-
Summary of Items
-
-
Getting Down to It
-
Timeline
-
Setup
-
Painting
-
Extra Drop Banner Work
-
-
The Finished Product
-
Summary
1 - General Notes
1.1 - Cost
For May Day, two of us did most of the work and a third joined us in the evening. All the stuff we bought (more detail below) cost in the region of €200. Of course, the cost will depend on what you already have and need to buy.
The Pride / Drop banners cost about €225 total for the two (including renting the space to make them).
1.2 - Time
It takes a lot of time to make a banner, particularly a big one like this. It took around 12 hours to complete, including breaks. Fortunately we had set aside the whole day to do this. We bought the fabric on Saturday 22nd, other supplies and sewed on Friday 28th, and made the banner the next Saturday 29th, to dry on Sunday 30th, and for use on May 1st. Overall, banner making and buying supplies took us roughly 20 hours.
The lesson is, if you're making a banner that's in any way large (say over 2-2.5 metres), I advise setting aside the whole day to do it. If you make plans for after the banner-making, you will likely find yourself having to cancel. Don't forget people need to eat lunch and dinner. Also, remember that banner-making requires buying/fetching things, possibly on several occasions. Take this into account when you plan.
1.3 - Engagement
Banner making can be an engagement opportunity. You can send out an email inviting contacts/supporters to help. Generally doing something hands-on together is a good bonding experience. This time, circumstances meant we just did it ourselves.
For the Pride / Drop banners we invited others to help us. About 8 other people joined us throughout the day. Since it would otherwise have just been 2 of us from the organising group, the extra people meant we could finish 2 banners - the Pride and Drop banners - by the evening, rather than early in the morning, or not at all. We started at 11am and finished at 8pm or 9pm.
2 - Design
2.1 - Words
The first question is 'what will it say?'. Since the theme of this year's May Day march was housing it was decided that 'We Only Want the Earth' would be good since it is relevant to that theme but also expresses broader anarchist aspirations for communal ownership of the planet. It's a quote from a poem by famous Irish republican and revolutionary syndicalist James Connolly which lends it further power. We decided to make a cool new banner for May Day which would be inspiring and go beyond simple slogans specific to housing like 'housing is a human right' or things like that. Other people will have those (worthwhile) banners.
2.2 - Material
The next questions are 'what will be the design?' and 'what material will we use?'.
We chose black material with white lettering because this looks striking. At first we saught black denim a very durable material which was suggested in a video we watched. But as we couldn't find that in any shop we bought black 'vintage linen' instead which is a pretty thick and durable synthetic-feeling material with a cross-hatched pattern. This pattern means that it will let some wind through, which is useful.
As the edges were a little rough, and would likely fray and unravel over time, the edges of the banner were folded over and stitched to have neat ends. This part is not essential but is worthwhile if you can do it.
The banner is 4 metres wide and (approximately) 1.5 metres tall. Cost a bit under €30 (about €7/metre). This banner is big, and therefore it requires 3-4 people to carry it. We would have gotten it slightly less tall if that were possible. It has to be bunched up a bit at the top by those carrying it.
We bought the same material for the Pride banner as it worked so well for May Day.
For the 12 metre Drop banner, we wanted something the right colour, cheap yet strong enough to be dropped off a building. We bought pink fabric for €42 (€3.50/metre). Pretty good for the height of a 3-storey house. It wasn't thin material, it was relatively dense and synthetic, with a slight stretch in it.
I found out where to buy fabric by asking someone who is very good at sewing and has made things out of material before. They knew several places to go.
Dublin-specific: The fabric shops we aimed for were Hickeys, Fabric Select, and WM Trimmings, all near each other in the Henry Street / Capel Street area (near enough to O'Connell street if you don't know). However, after trying two shops we were referred to Guiney's on Earl Street North (3 mins away), where we bought the material.
2.3 - Design
To create the design, 3 rough mock-ups were sketched on paper with pen.
The second one, with the Earth standing in for the letter 'O' was chosen.
From this, a proper design which is shown below was created using Adobe Photoshop. This is needed so you can project the image onto the fabric. The Earth picture which sits inside the 'O' was found by searching for 'cartoon Earth' online. You don't have to use Photoshop. My favourite free online image editor is www.befunky.com. It's easy to use and is very good for text on images. But it doesn't let you place images onto other images (like the Earth here), which www.fotoflexer.com does but isn't as good for lettering.
The Pride banner is below. We picked pink as it's a bright colour which stands out on black. It's associated with queer politics and Pride, which white isn't. The red nicely emphasises the key words, and the name of our group.
We bought 6 metres of fabric because I thought it would have to be 1.5 times wider than the May Day banner. This was because there are more words per line in the Pride banner. However, I was mistaken and we only used 5 metres, cutting off the extra meter at the very end using a Stanley blade.
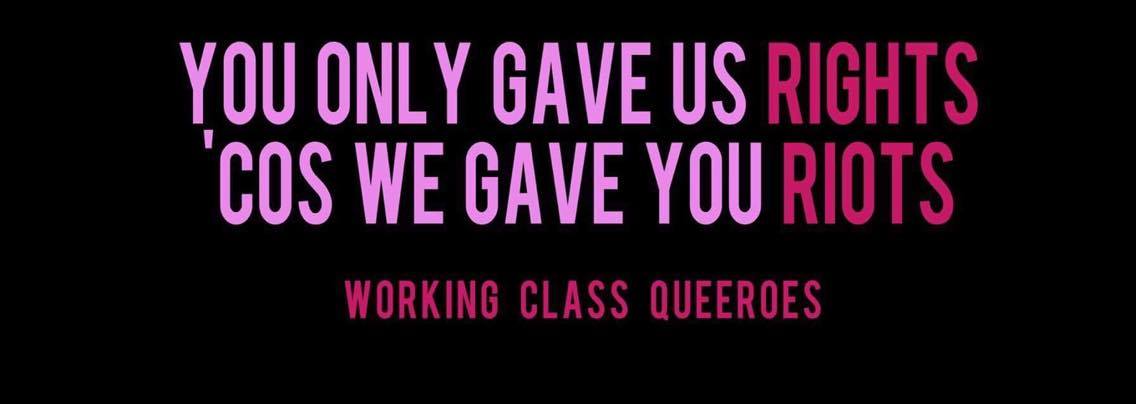
The Drop banner design is shown below. It's pencil-shaped and vertical as that was the shape of the banner. Originally we used a skinnier font, but we made it fatter so it fills out the (vertical) banner better and is more visible.

3 - Making the Banner
3.1 - Method
To make the banner we needed a plan of how we'd get the design onto the material. To do this, we asked a comrade who had made an excellent banner before for their method. So, we elected to hang the material on a wall and shine the design onto it using a projector. The next step is to trace the letters while it hangs up, and then when that's done take it down onto the floor and fill in those letters with paint until complete.
Using a projector is the best way. Do this unless you can't access a projector at all. An alternative is printing out sheets of paper with letters on them, e.g. a big 'E', and using these as stencils.
3.2 - Supplies
The next question is 'what supplies do we need to make the banner?'.
Firstly, people. We did most of it with 2 people and finished it with 3. Even still it took a long time.
Secondly, a place to make it. You need plenty of room, a large enough wall to hang your banner, and need to know that the banner can stay put while it dries without someone moving it or walking on it. We made our May Day banner in Jigsaw, which is a fantastic anarchist social centre in north Dublin city, in which the WSM Dublin branch has our office. We made the Pride / Drop banners in A4 Sounds, an artists' studio which sometimes rents out a big room to others for events.
Well obviously you need paint, we needed white for the letters, and blue and green for the planet. 1 litre white, and 1 litre green, 1 litre blue would do (barely needed any blue/green, so much less than a litre). Bought in woodies. The white was matte. The blue and green were gloss. Tried both types as an experiment, matte should be fine. The handy thing about matte is that if you make mistakes, smudge, etc, you can rub it off with water and elbow grease. Gloss is messier. The paint was €50-60 overall.
For the Pride and Drop banners, we bought 2 tins of pink, 1 of black, 1 of red, each tin 2 litres. We didn't even need 1 litre of pink, and even less of black, and less again of red. However, you can't always get the colour / price / volume you want. The excess of pink was because firstly I misremembered how much white we needed for the May Day banner, and secondly to cover a larger, 6 metre banner. The paint cost €56 overall. This is why the small details are included here, so you don't waste money! We donated the left over paint to Jigsaw anyway.
The pink paint inadvertently came in handy as a kind of pink Tippex for the mistakes/spills on Drop banner, since it had a pink background. Look how much pink we used, not even a litre.
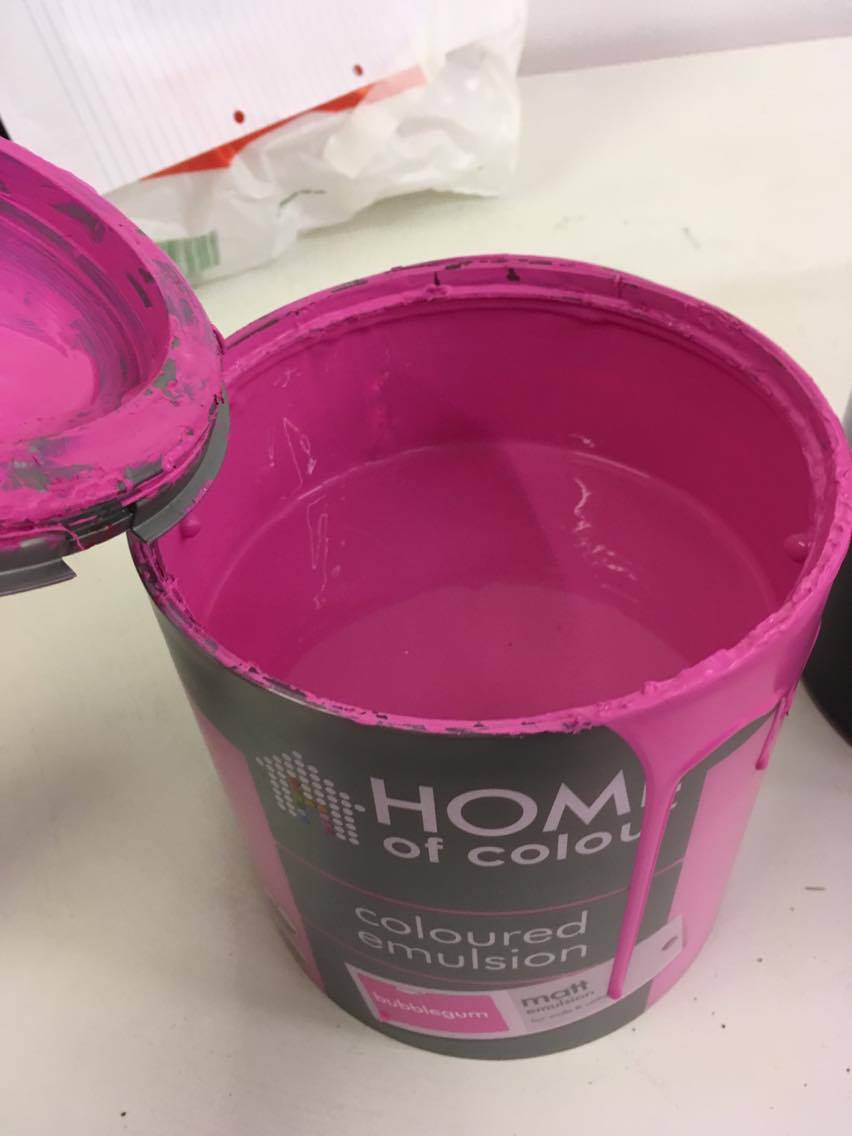
And painting clothes you don't mind getting paint on, including shoes! I ran out of the house like an idiot wearing my good clothes, but managed to get away with it by always watching myself.
You'll also want a way to open the paint tins, hence a screwdriver. And a way to stir the paint, hence a bit of wood or bamboo.
You need brushes to paint with. We started with 2 brushes (for two of us, shown below). Soon we realised that these brushes were bad for achieving neat lines at the edges of the letters, and went to a nearby hardware shop to get better ones. I forgot to photo these, but they weren't a million miles off the ones shown below, just with a slightly narrower tip. They were better, but it was still quite an effort to get clean lines. Really you want brushes with a very fine tip, this will make you curse less.
For the planet Earth, the brushes we had were really awkward. The next day the Earth was quickly finished off with a much smaller brush.
For the Pride / Drop banners we bought 12 brushes in a paint shop in the city centre, similar to the ones shown below, two packs for €14 overall. Unknown to me someone brought a few more, and a few skinny brushes you might use for watercolour painting. People appreciated the new wider brushes, which worked better (presumably less rigid), but the skinny brushes were needed to paint the smaller 'Working Class Queeroes' letters, which were almost impossible to outline correctly with the wider brushes. The lesson being, a mixture of wider and skinny brushes is best.
To trace out the letters when the banner is hanging up we needed something which would stand out on a black background. Chalk pen? Tippex? Someone in a shop suggested 'tailor's chalk' which is shown below and looks like a shruiken. If you're using a lighter banner, of course a dark permanent marker (not with a stupidly fat tip) will work. However, for the Pride banner we just used ordinary white chalk which worked perfectly fine and is easier to obtain.
How do we hang up the banner? Well we could nail it ... tie it up ... but tape is the best way. But you don't want to rip the paint off the walls when you take it off, so we used 'frog tape' – it's wider than electric tape but is similar enough in its feel and not being too sticky. Shown below. For the Pride/Drop banners we used masking tape. Possibly marginally less strong but both frog and masking tape do the job.
Of course you'll need a projector to project the image. Handily in Jigsaw there's a projector. You'll need a laptop, and cable to connect your laptop to the projector. This will probably be a VGA cable or HDMI. You'll also probably need an extension lead or two (we needed two). This was all in Jigsaw for us so we didn't have to think about it.
The banner image was brought on a USB memory stick, but make sure you email it to yourself or otherwise have it online (unless there's a reason you shouldn't) just in case you forget it. If you don't have a laptop, borrow one. Do not neglect this part as you're completely screwed without a laptop & your design. Waste of time, and it happens.
For the Pride/Drop banners luckily two of us independently decided to bring our laptop. One Mac, one PC. The Mac didn't have a socket to accept the VGA cable needed to connect to the projector. The PC did. Make sure this stuff is planned in advance. If the PC wasn't there, we couldn't have done any banner making.
For the Pride/Drop banners I went to pick up the WSM projector from Jigsaw, and was delayed bringing it back to A4 Sounds. This meant everyone had to wait, as after taping the banner to the wall you can't do anything without a projector. Make sure it's there first.
For the Pride / Drop banners we really needed the 2-3 extension leads which we brought ourselves.
You'll need a table to put the projector onto (we did). You'll also need a big and long wall to hang the banner on. Luckily Jigsaw has a lovely big wall which worked perfectly.
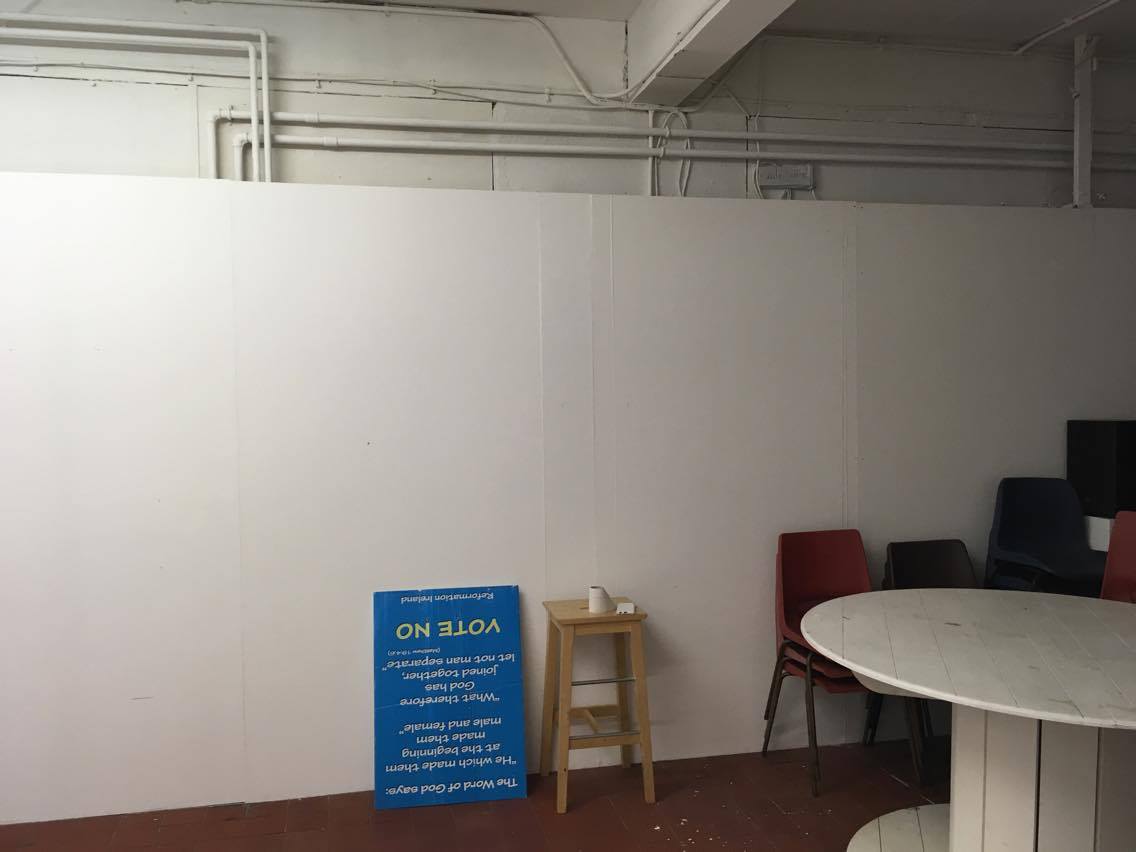
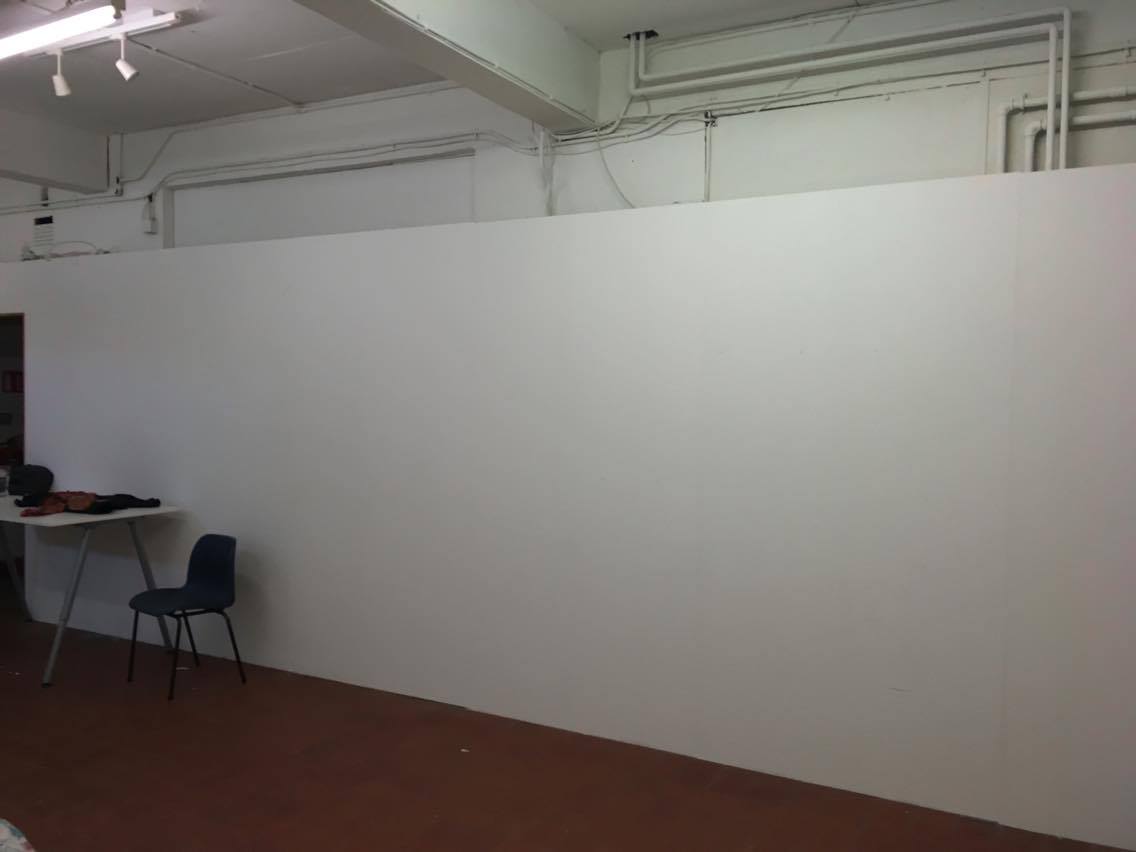
However, for the Pride/Drop banners we used A4 Sounds because Jigsaw was busy that day. It cost us money, but it turned out to be much better for us as A4 Sounds has a significantly longer wall which was needed for the very, very, long Drop banner, and indeed for the Pride banner which would have been a bit too big at 5 metres. In the pictures below you can see how long the wall is (you can also see an upside down Bible-quoting 'No' campaign poster from the Equal Marriage Referendum which we brought).
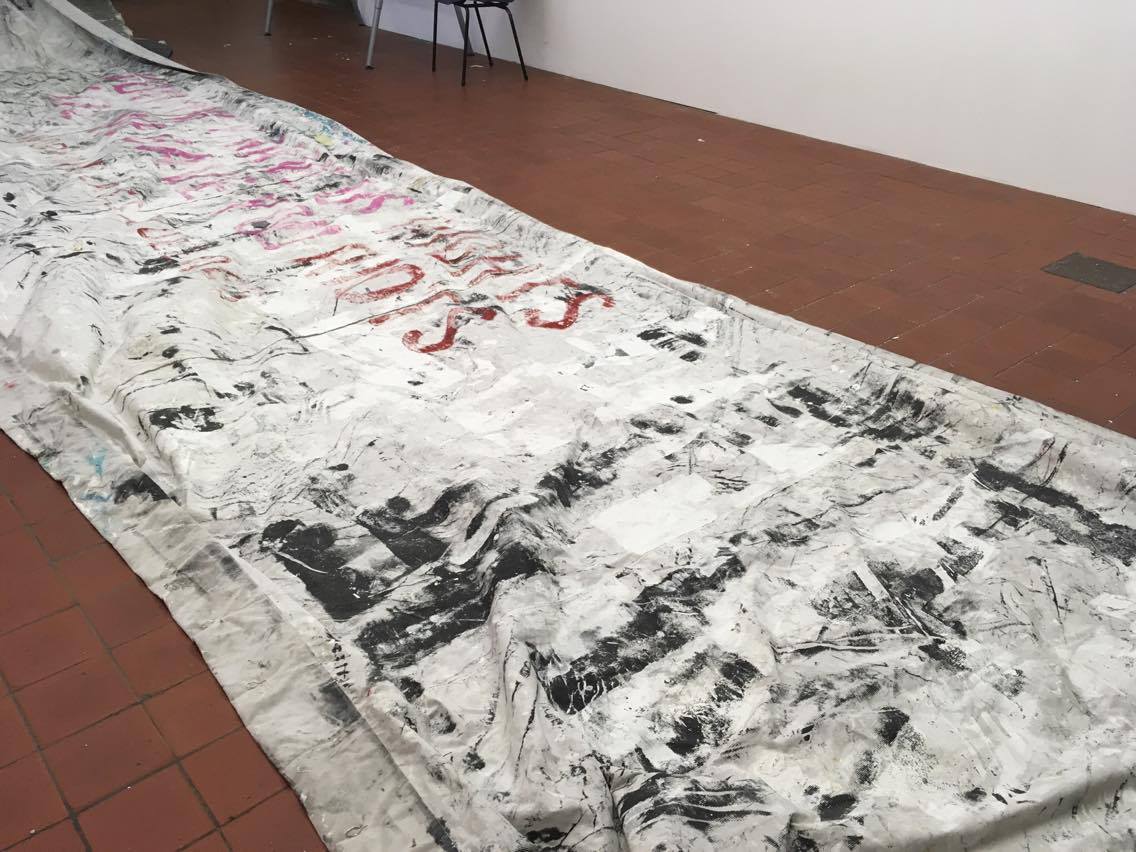
Once traced, the banner will need to be put on the ground. But you don't want the paint to soak through the banner and wreck the floor. So we brought a painter's sheet (basically a big sheet / piece of cloth you don't mind ruining) and a big shopping bag full of old newspapers. The sheet was laid on the ground and newspapers put on top also just in case. The sheet was almost large enough to cover the entire floor under the banner, and the remaining bit was made up for by newspapers.
Also the newspapers are very handy to have generally where paint is in use. Handy to place the paint tin on, paint tin lids, and paint brushes. Below is A4 Sounds' painter's sheet which they provided.
Finally, tunes (music) can make things a lot better, so a way to play those if you like.
3.3 - Summary of Items
Those are all the items we needed. In summary:
-
Volunteers
-
Place
-
Banner fabric
-
Sewing machine + thread (optional)
-
Paint
-
Paintbrushes (thicker, thin, very small for detail)
-
Painting clothes
-
Stirring rod
-
Screwdriver (paint tin opener)
-
Painter's sheet
-
Newspapers
-
Chalk / Marker
-
Frog / Masking tape
-
Big wall (to hang on)
-
Big floor (to paint on)
-
Laptop (which can accept the cable that connects to the projector)
-
USB Stick with Design
-
Projector (with power cable!)
-
Cable (Laptop -> Projector, VGA, HDMI, etc.)
-
Extension leads
-
Stanley blade / Craft knife / Scissors
4 – Getting Down to It
4.1 - Timeline
Here is a rough timeline to give you an idea of the time breakdown of each task:
-
Set-up (1 hr): 12:30 – 13:30
-
Tracing Letters with Chalk (30 min): 13:30 – 14:00
-
Lunch (2 hrs): 14:00 – 16:00
-
Banner on Floor & Painting (7 hrs): 16:00 – 00:30 (including dinner/pint 1.5 hours)
4.2 - Set-Up
Set-up included sorting out the lighting (Jigsaw is dark), sweeping (so the banner wouldn't get covered in dust if it touched the floor), setting up the projector, and moving furniture for a clear projector path to the banner.
We hung the banner on the wall, attaching bits of tape at the top.
Make sure that you get it straight, or else when you project onto it the image will be wonky. We attached tape at the sides also so the sides weren't flapping around.
We put the projector on a table with the laptop and connected them. Originally this was 3-4 metres from the wall, but when we projected onto the banner the image was too small. We realised we had to move backwards a good bit so that the image would spread out onto the banner. The banner is quite tall so we wanted to put the text a bit lower down so that people could bunch it up at the top while carrying, without distorting the slogan. We had to prop up the projector with some stuff to point it a bit downwards, and also to correct for a slight slant so that the letters were perfectly flat across.
The only thing with the chalking is make sure you can clearly see the letters when you take the projection away. With a marker be more careful as you can't rub it off like chalk.
For the Pride banner, we couldn't move far enough away from the fabric taped to the wall to project the whole image onto the fabric at once. So we projected it in two stages. Make sure you know this will work before tracing. Also, make sure that when you move onto the next stage, the letters line up perfectly, or else you'll have a banner with wonky letters.
For the 12 metre Drop banner, it was too long to fully extend and tape onto the wall. So we had to tape part of it to the wall, trace that, take it down, tape up another part, and so on, three to five times. This was quite a co-ordinated effort involving several people, since the tape can come off at one end of the banner while you are standing helplessly a few metres away (and because the banner was so long, it was quite heavy overall and more likely to come off).
Of course this meant we had to project the design onto it in several stages. To make sure we didn't screw it up, we spent 5 hard minutes of concentrating and deliberating to figure out the correct zoom on the laptop. You don't want to trace half the letters only to realise you've run out of fabric. We worked it out perfectly using two methods. A couple people measured one letter (at the size we were proposing) and then multiplied that by the total number of letters (plus some educated guesses) to see if it was the 12 metre length of the banner. Another couple of us measured the letters with our hands, asked for the banner to be fully extended, and went along the banner adding the letters in our minds, seeing if it seemed reasonable by eye.
4.3 - Painting
We gave it roughly two coats of white paint. The first takes longer as the fabric soaks up a lot of paint. The second is quicker, and really makes the letters pop. First coat below. We timed our dinner break after the first coat so it would be dry when we came back to do the second coat. (For the Pride banner we did the same with our lunch break).
Second coat below. Note how the first coat is patchy, while the second is solid. Really it got 2 formal systematic coats, plus going over it a few more times touching it up more randomly, which probably means 3 coats overall. Two coats are completely necessary.
Remember you need enough time for the banner to be dry before you use it. Allow at least one day. Otherwise, hairdriers at the ready.
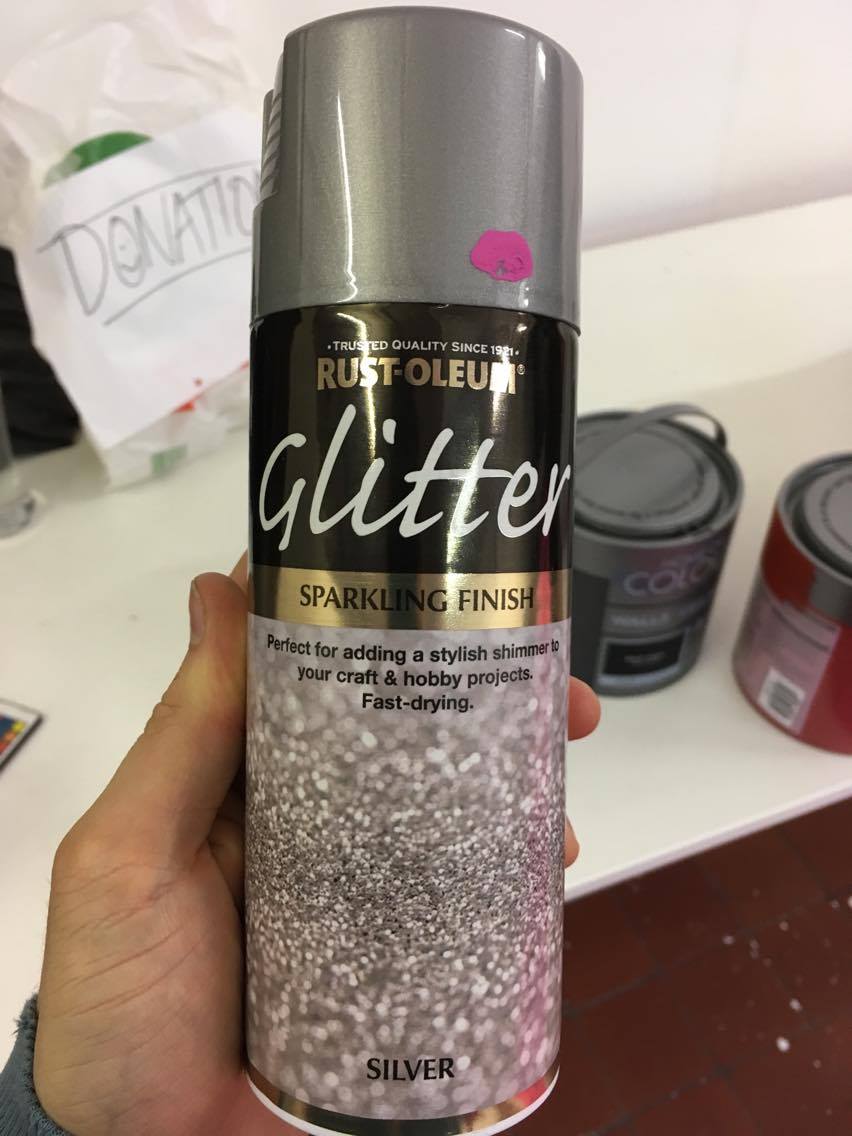
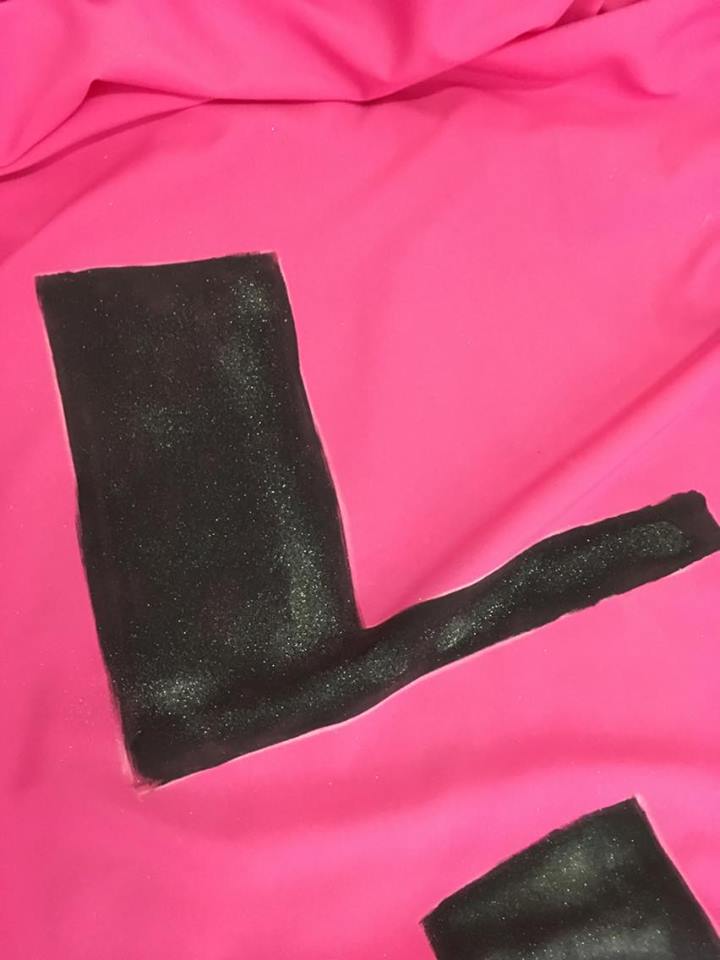
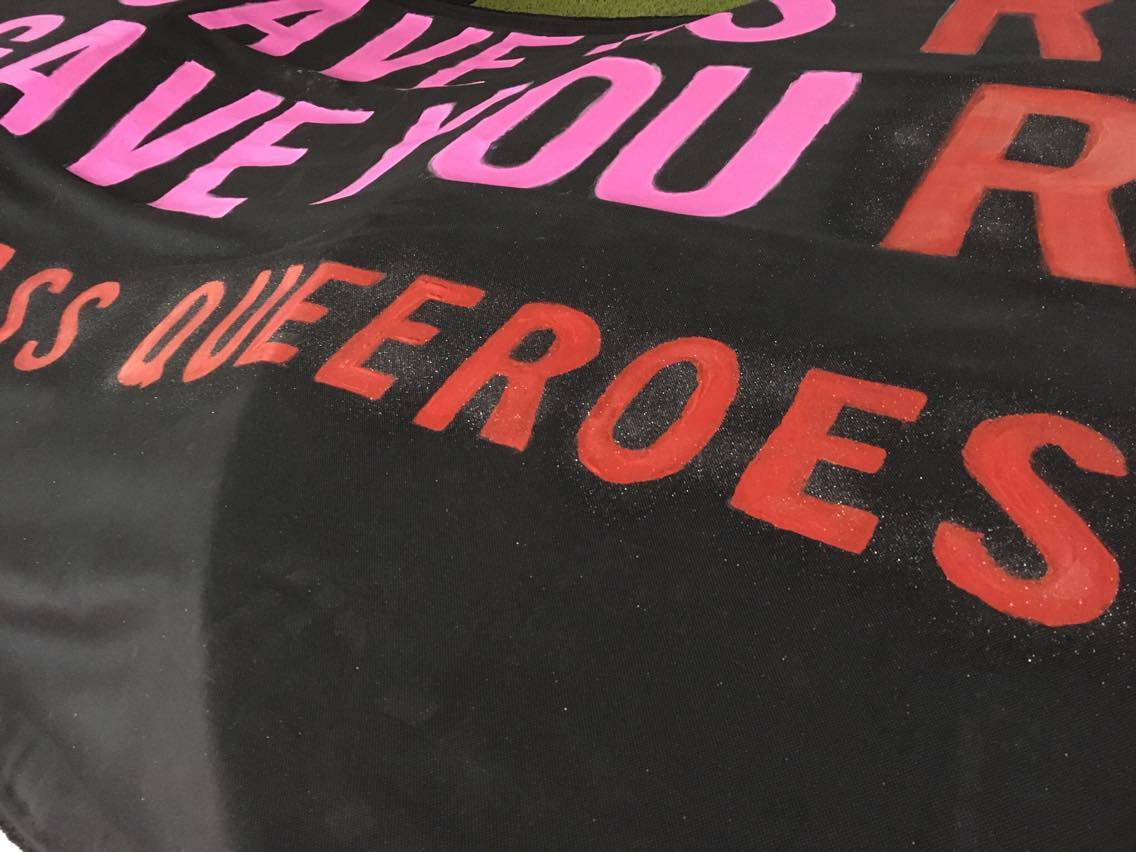
For the Pride / Drop banners we bought a can of silver glitter paint. It's quite expensive at €13 and it only covered the word 'Liberation' on the Drop banner, and 'Working Class Queeroes' and 'Riots' on the Pride banner. But it really does work.
That's it basically. We toyed with the idea of weighing down the bottom with either a piece of wood or with magnets so that it wouldn't sway in the wind, but haven't done this yet. Also an option is poles at the sides of the banner.
Last thing to do is use the banner, and store it properly so it doesn't deteriorate.
4.4 - Extra Drop Banner Work
A banner for a banner drop isn't necessarily the same as one for carrying on a march. Here are some extra things we needed to do to make sure the banner was fit for purpose.
Banner drops are done in different ways. This won't apply to every banner drop. For starters, banner drops can be done with horizontal, or square, rather than thin vertical banners. The banner you make also depends on where you're going to drop it. Plan this carefully so you don't embarrass yourself.
We needed a way to fix the top of the banner onto something on the roof so that it stayed in place for several hours without tearing. We also wanted to weigh down the bottom of the banner so it wouldn't sway around as much, keeping the banner in place and most easy to read. The top wooden bar needed to stick out the sides of the banner so we could tie rope onto it, and then tie those ropes onto something on the roof.
To do this, we met up a week after painting the banner to make these changes. We attached a wooden bar at the top and bottom of the banner, shown in final form below.
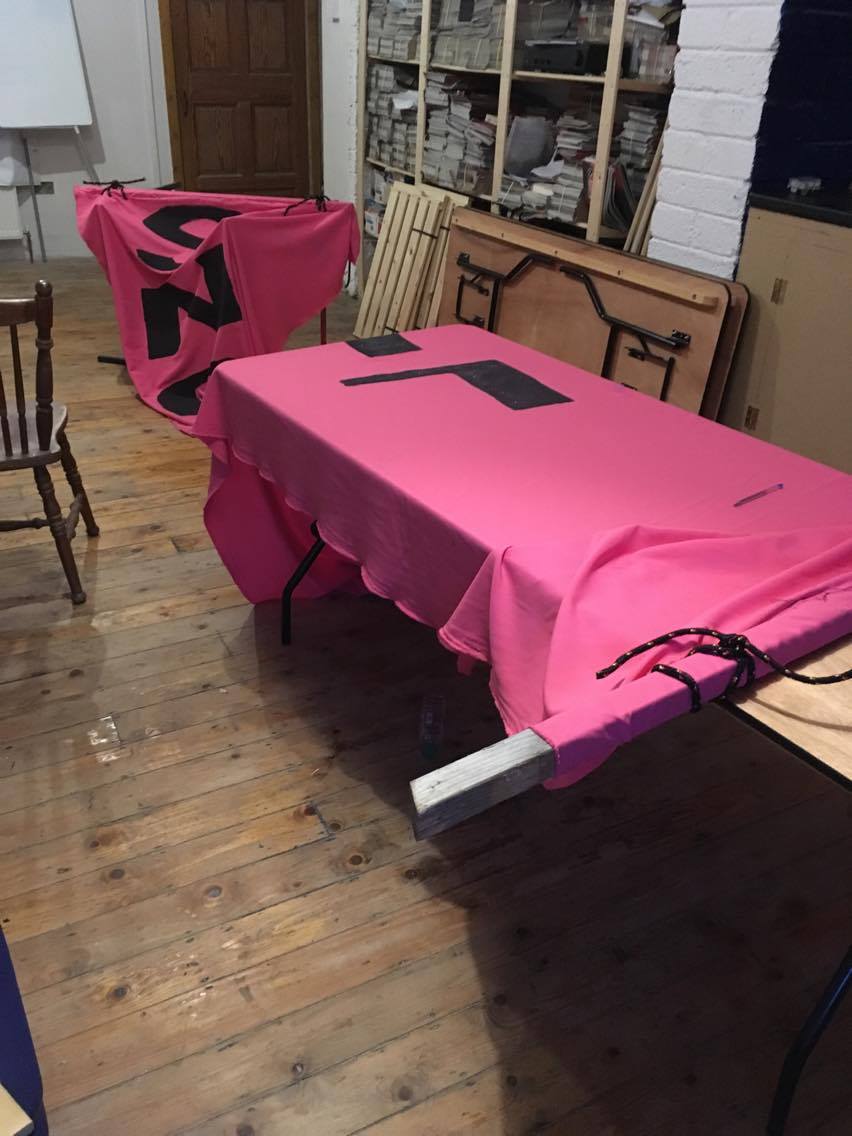
To do this we made the fabric into a loop at the bottom and the top of banner by folding it back on itself and stitching it. The photo below shows the wood at the bottom of the banner.
The wood was free. Originally I took the wood from a skip at home. But there was better wood in Jigsaw.
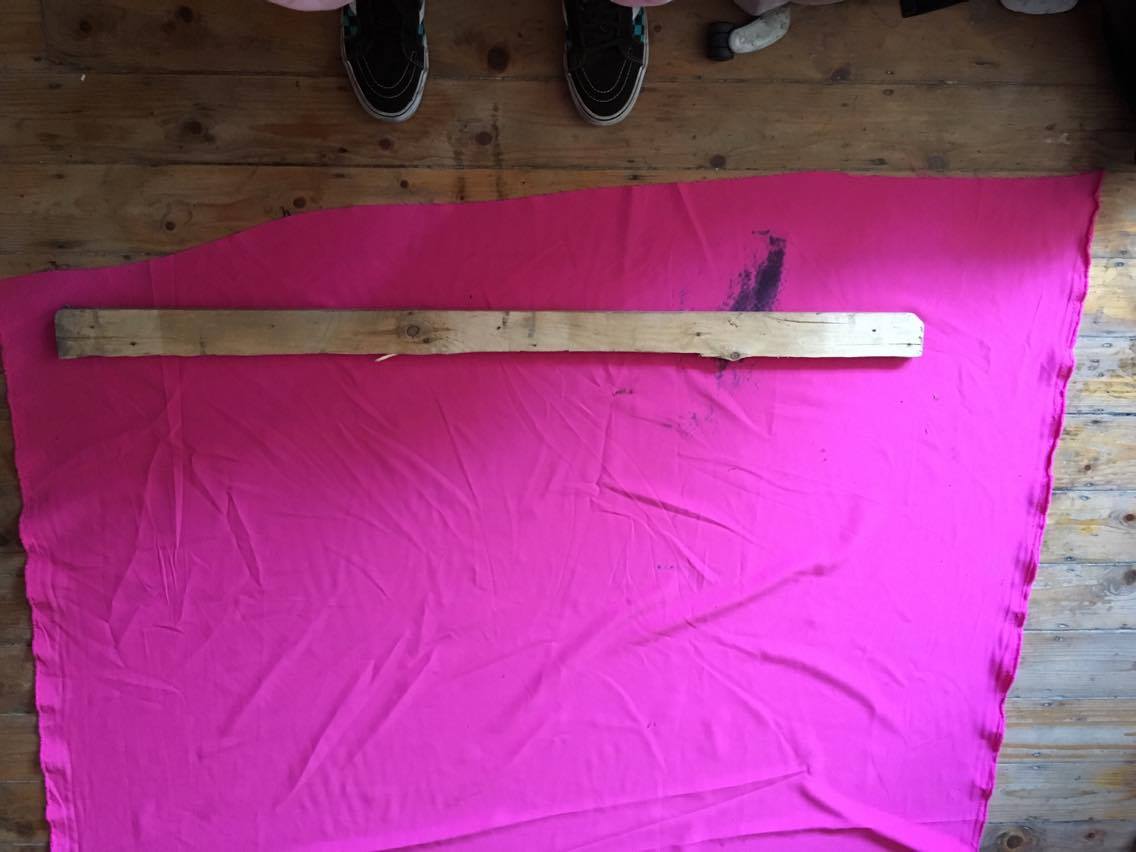
Out of the two of us making these changes to the drop banner, only one could stitch, and wasn't very experienced. But they could do it well enough to get the job done.
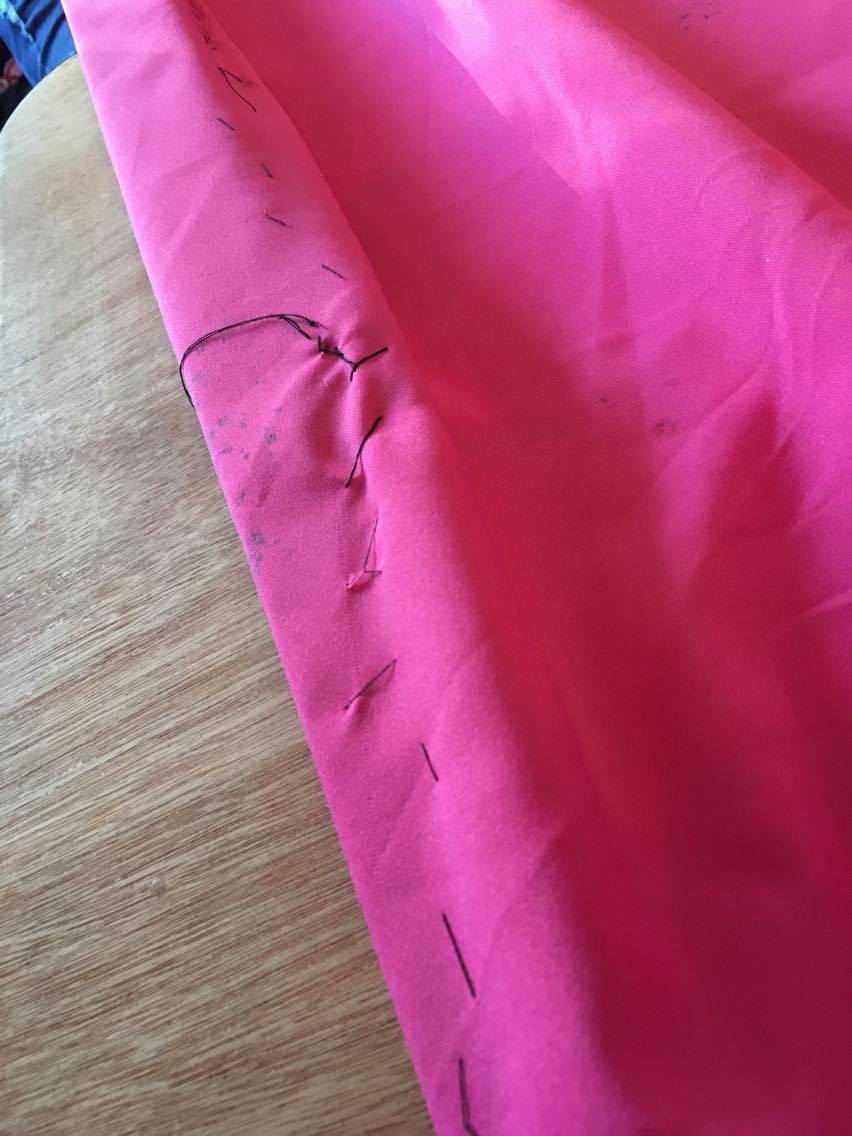
The picture below shows the side of the bottom of the banner. The side of the loop was sealed shut so the wood couldn't fall out, by stapling it with a normal stapler. This was much faster than stitching.
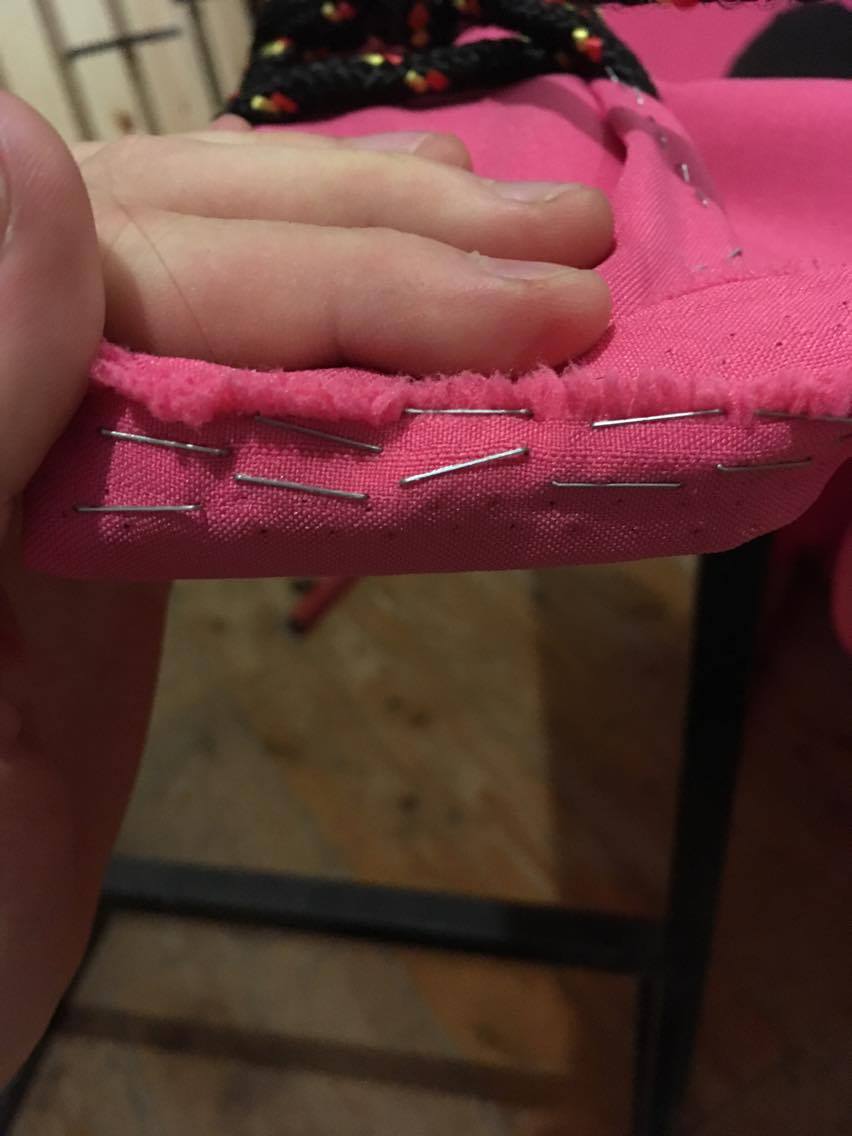
The same was done for the top. In fact, we went over it with staples as much as we could to reinforce the stitching.
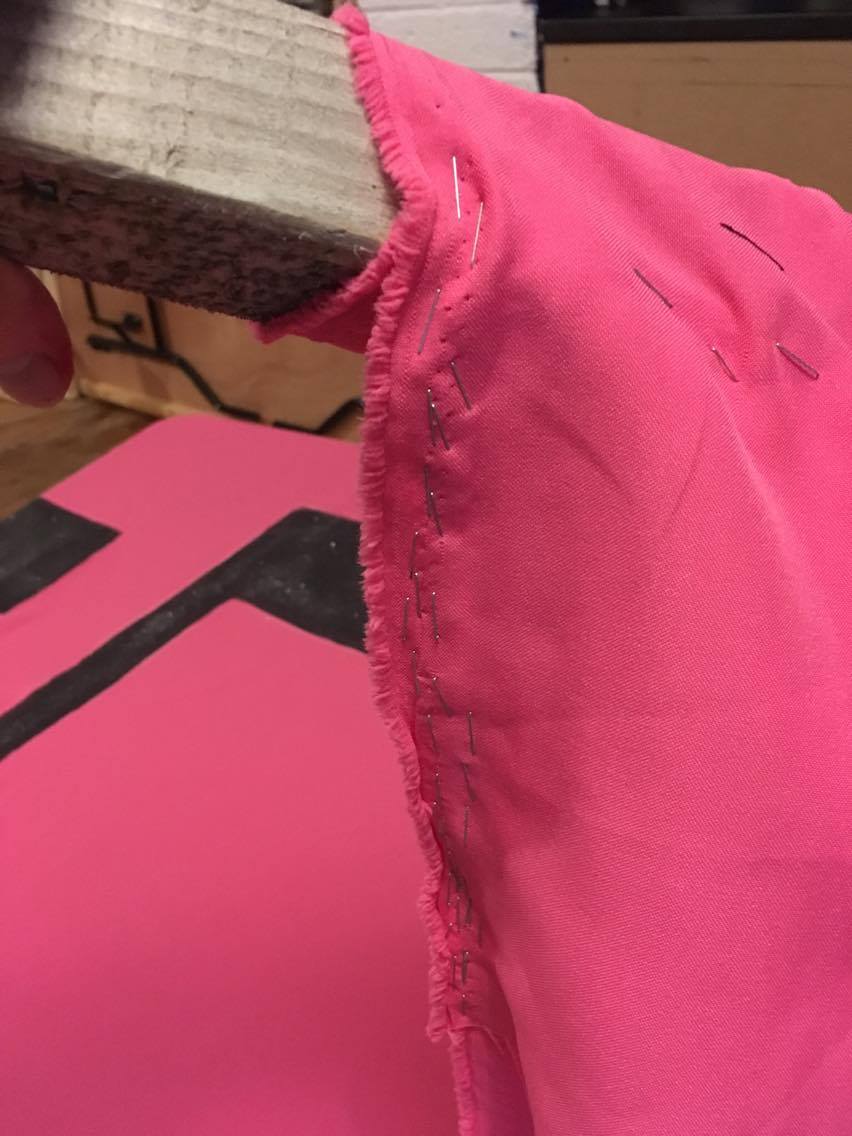
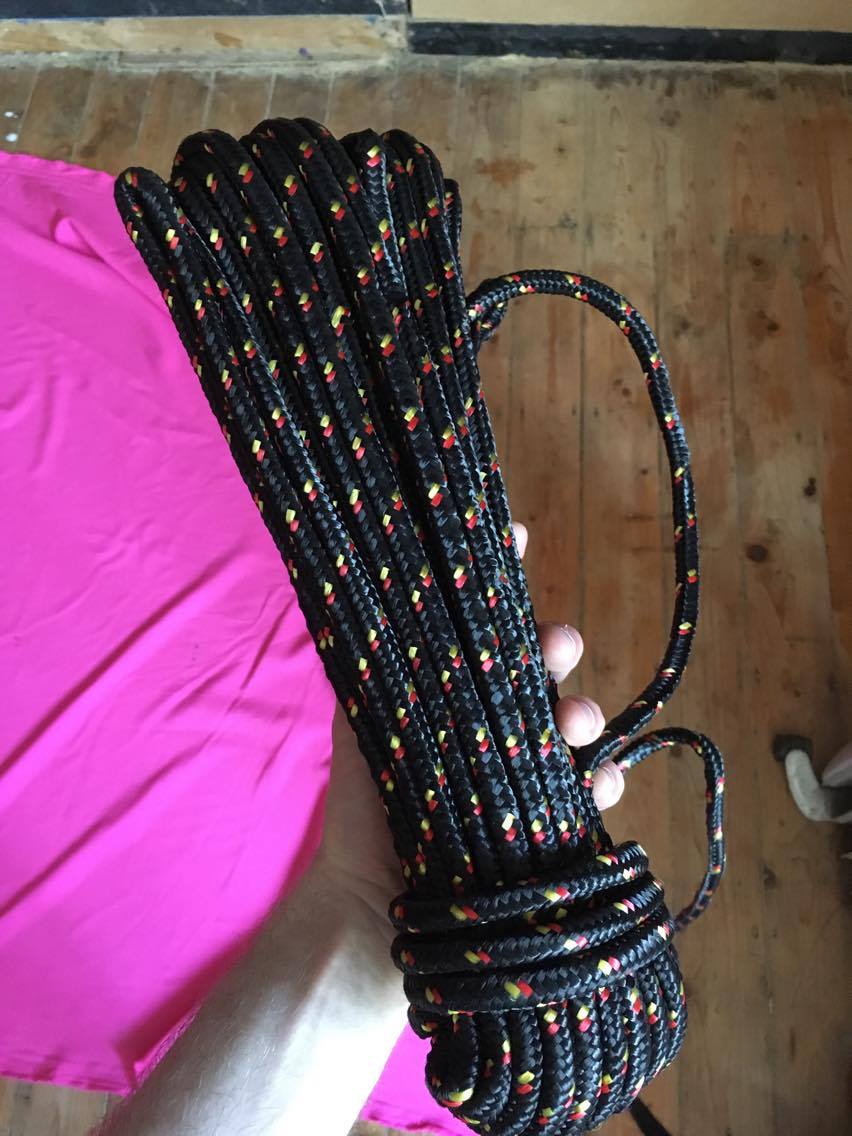
We bought rope for the banner drop to tie the banner to the roof. But we ended up also using it to fix the wooden bars to the banner. The rope cost €5.50 in Homebase, for 30 metres. That's good value.
Although we thought the stitching and staples would probably be grand, we weren't certain or confident they would hold once the banner was dropped. You really don't want the bottom wood to fall out and drop on someone's head, or for the top wood to escape and the whole banner drop from the roof.
So we tied knots around the wood using the rope as shown below. The idea being that even if the stitching came undone, the rope would be firmly binding the fabric to the wood. We made three holes using the Stanley blade. Only make the holes just big enough for the rope to fit through, a bigger hole increases the chance of tearing. To cut the shorter pieces of rope from the main 30 metre rope, we used the Stanley blade, and then melted the ends of the rope with a lighter so they were tight rather than frayed. The latter wasn't necessary here, but it's a good thing to do, just don't engulf the rope in flames or get molten plastic on your skin!

We tied these ropes off using a standard 'square knot', and doing another one on top of that again just to be sure, pulling the ends sticking out really tight for safety.
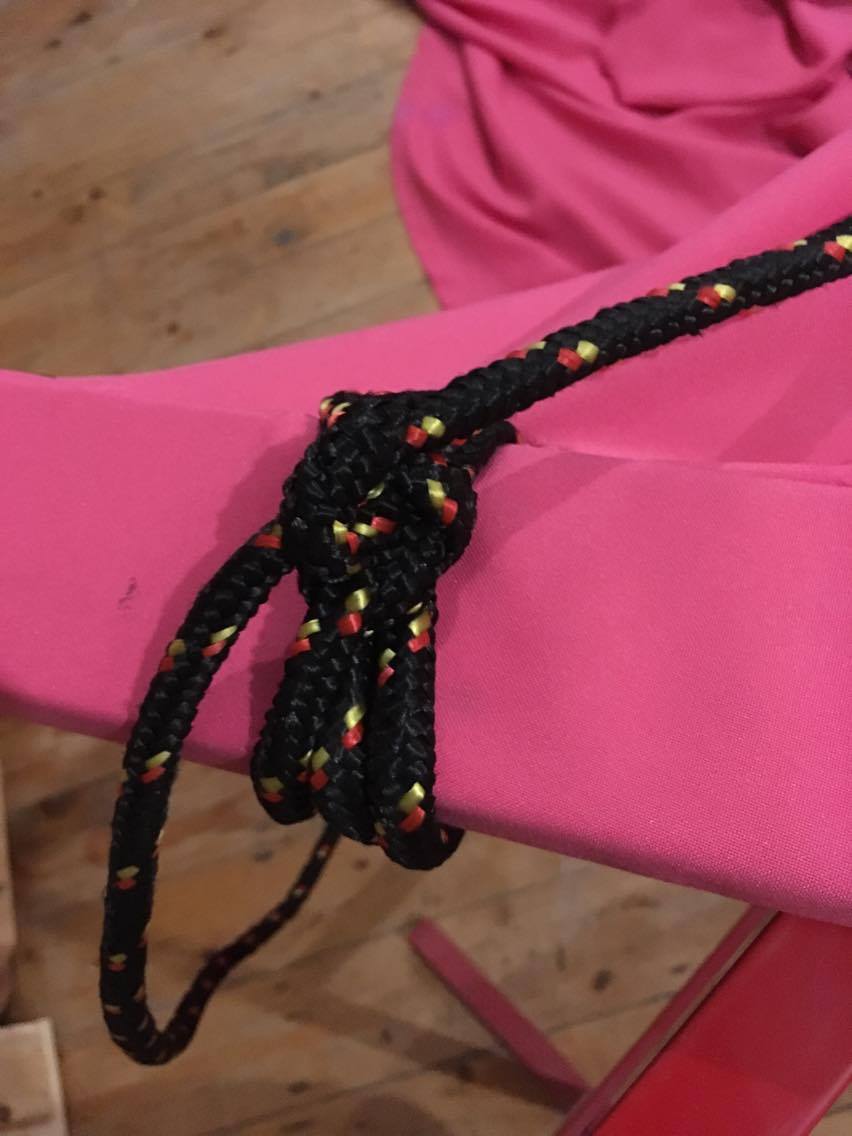
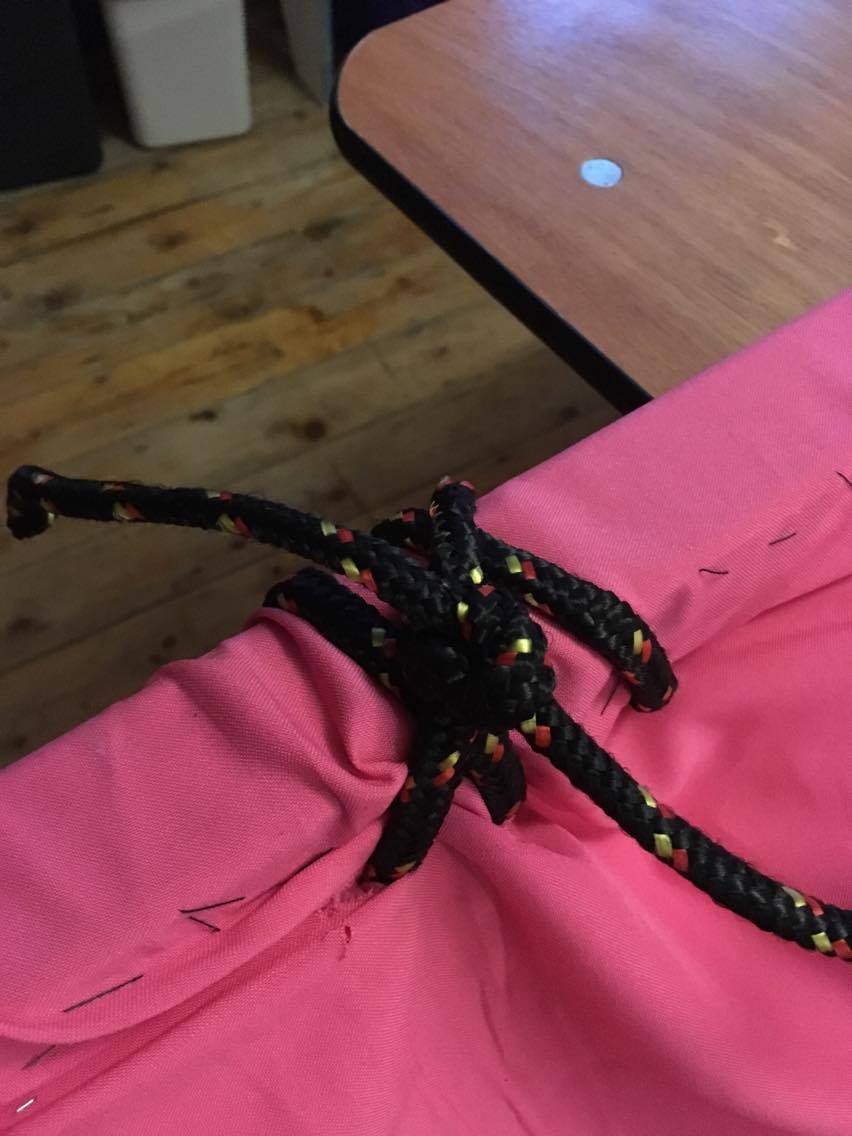
It was quite windy on the day of Pride, and the wood at the bottom of the banner wasn't enough to stop the banner blowing around quite a lot, especially since it was so long. On the day we ended up tying the bottom to two cinder blocks on the ground (the banner was almost touching the street), tying the cinder blocks to the knots shown above.
The banner ended up having to be taken back up onto the roof by the people who worked in the building (it had been done with permisison) due to wind after about 4.5 hours. In hindsight we needed to have some way of stopping the long middle of the banner flapping around so much. That would be fairly complicated.
6 - The Finished Product
Below are pictures of the three banners finished and in full flight.
Here's the final May Day banner. We were happy with how it turned out. It was well received at the demonstration and on social media, and we got several compliments about the slogan and the physical quality of the banner in person. The high quality added power to our message, which was that the wealth of the Earth belongs to all of the inhabitants of Earth and that we will not settle for anything less than democratic control of the whole planet by the united working class.

Here's the final Pride banner. Again, we were happy with how it turned out. Again, it was well received at Pride and on social media, and we got several compliments on both the slogan and the physical quality of the banner in person. The high quality added power to our message, which was that the reason queer people have taken a step forward is because we said 'fuck it' and disrupted the system oppressing us, rather than focusing on trying to make our oppressors feel comfortable about us and politely asking the government for help.
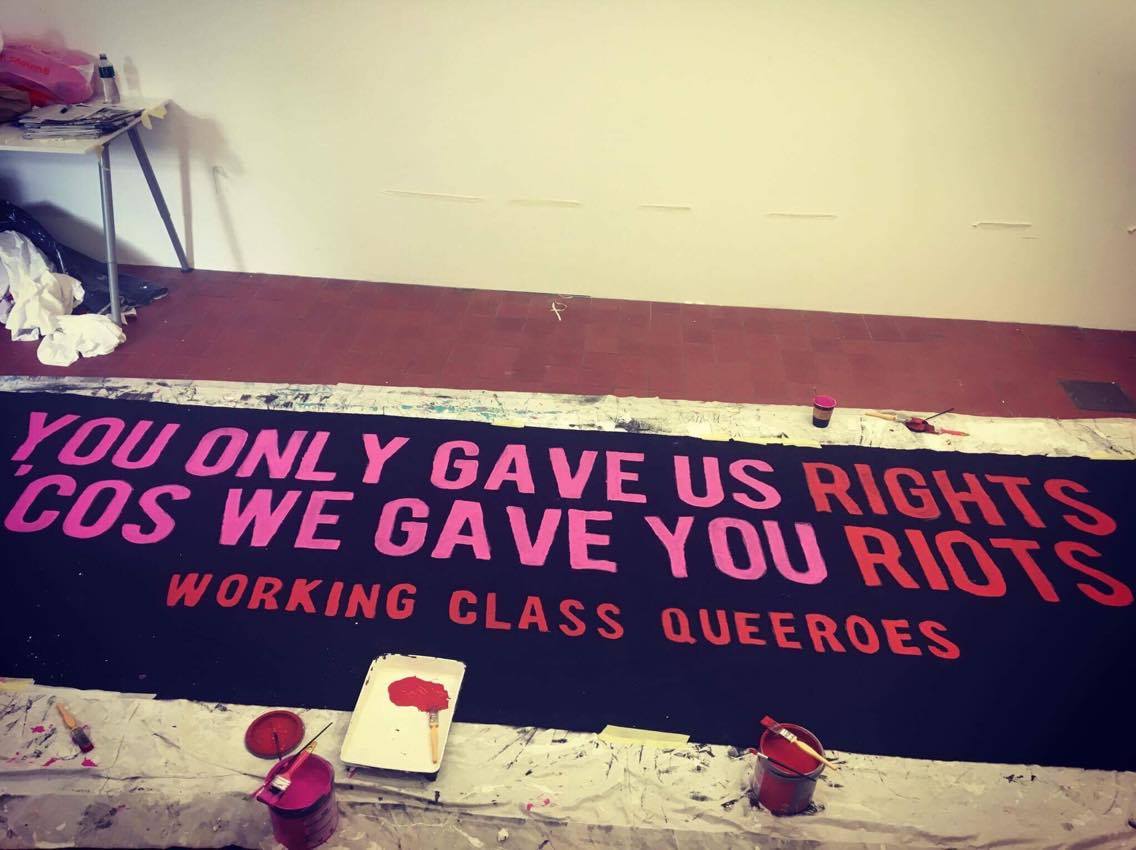
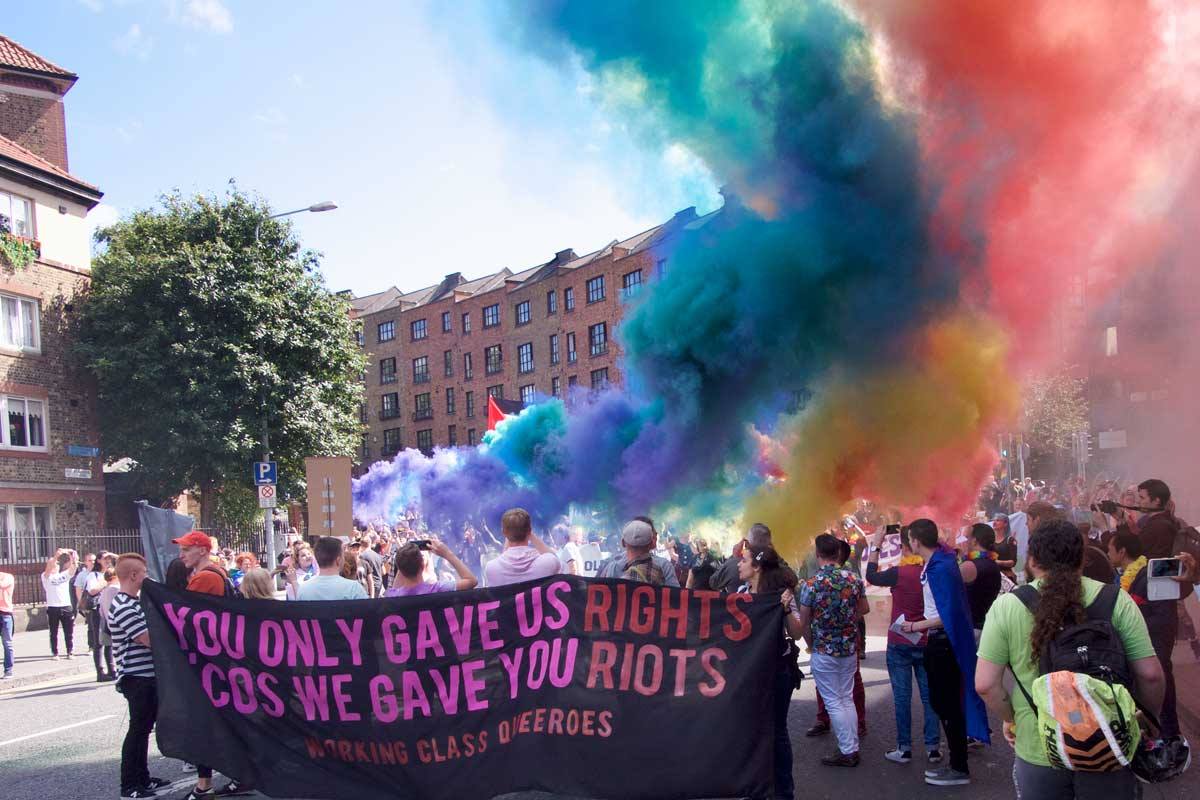
Here's the final Drop banner. The same comments above apply. Although, it wasn't well received by some as we positioned it so that our 'Liberation Not Corporations' banner was the first thing people saw when the Pride parade arrived at the finishing point at Smithfield Square! We can only speculate as to whether it was Facebook, Bank of Ireland, Amazon, Deloitte, Paypal, or Tesco (or the other 62 corporations present) who were the most annoyed.
6 - Summary
As there is a lot of detail in this guide, here is a brief summary for your convenience.
6.1 - Materials
You can use this as a shopping list or checklist. Most items are essential.
-
Volunteers
-
Banner fabric
-
Sewing machine + thread (optional)
-
Paint
-
Paintbrushes (thicker, thin, very small for detail)
-
Painting clothes
-
Stirring rod
-
Screwdriver (paint tin opener)
-
Painter's sheet
-
Newspapers
-
Chalk / Marker
-
Frog / Masking tape
-
Big wall (to hang on)
-
Big floor (to paint on)
-
Laptop (which can accept the cable that connects to the projector)
-
USB Stick with Design
-
Projector (with power cable!)
-
Cable (Laptop -> Projector, VGA, HDMI, etc.)
-
Extension cables
-
Stanley blade / Craft knife / Scissors
-
Thread + Needle / Staples (banner drop)
-
Wood (optional / banner drop)
6.2 - Method
-
Words + Design
-
Obtain Supplies
-
Set Up Room & Projector
-
Banner on Wall
-
Project and Trace
-
Banner on Floor
-
First Paint Coat
-
Second Paint Coat
-
Dry
6.3 - Time
-
Longer than you think.
-
Probably morning till night.
-
Budget more time than 'needed'.
-
As a very rough way to think about it, for a big banner (for example, 4-5 metres) presume it'll take 12 hours and deduct 2 hours for every extra person.
-
Allow a day for the banner to dry.
6.4 - Cost
-
It can cost you nothing extra if you already have all that stuff (paint at home, from a friend, social centre, have the tools, spare fabric somewhere, etc).
-
Expect to pay at least €15-40 for fabric.
-
Realistically expect to pay at least €100 for a good banner overall. It can be €200.
Good luck with your banner and with your struggle.
| Attachment | Size |
|---|---|
| How to Make a Good Banner - WSM Guide - (PDF).pdf | 2.74 MB |

